Pages

Showing posts with label craft projects. Show all posts

December 24, 2011

Christmas Eve is Here Again

The shopping has been finished and wrapped and under the tree for almost a week. I am taking lots of time to sit and enjoy evenings with HOTGI and the animals. Today is Christmas Eve, and it feels damn good to be finished everthing.

He-of-the-Good-Ideas went out earlier "for a drive". Uh huh. A drive. When he got home though, I disappeared upstairs so I didn't see what he was bringing in (I hate spoiling a surprise!) and I have since been banished upstairs so he can go all elf-tastic with the wrapping paper.

Tomorrow morning we'll get up, open the stockings that Santa left and drive to HOTGI's hometown for Christmas Day with his family at his sister's house. I am really looking forward to witnessing Christmas morning for our niece and nephew this year!

Monday, we are hosting my mom, grandma, dad and stepmum for Christmas at our house. We have a Butterball for the oven and a cupboard full of Christmas Cheer and I am super excited. I can't wait to set the table and set out the place cards I made!

I am so glad I am relaxed enough to enjoy everything about the Christmas Season this year.

Let me share you with something that warms my heart:


Happy Christmas to all of you. For those of you that follow my blog, thank you. I appreciate your comments and love to hear feedback for what I am posting. This first year of having a blog has been great for me. I've loved sharing with my readers some things I have cooked and crafted, and I find now when I create something I feel as though I should have a camera at the ready!

There will be another turkey soup made soon and I plan on updating my turkey soup recipe with pictures! Look for some other turkey leftover ideas too!

.

October 28, 2011

Upcycle a book into a decorative pumpkin!

I've been seeing books turned into creative decor items all over the internet recently so I decided to try my own. In the spirit of Halloween, a pumpkin seemed to be a good choice.


Adorable!
You should try it too! Here's how I did it...

First thing was finding a paperback book I didn't mind destroying. I am pretty particular about my books, so selecting one that was going to be ruined was a serious internal debate. I chose a book that came in a box of random books I bought at an auction that I had zero interest in reading.

Ripping the front and back pages off made my heart beat quickly. Ruining a book goes against everything I believe in.


I drew the shape of half a pumpkin on the front page.


Time to start cutting away the excess paper outside the pumpkin shape.

I started with scissors.


After the first few pages, the scissors became too awkward to use, so I switched to a knife with a fresh blade. The new blade was necessary since I tore a bunch of pages with the dull blade that was in it.


There were a LOT of teeny tiny paper pieces while I was cutting, it was a handy idea to keep the vacuum nearby!

Now... when you do yours, try and keep your edge straight. Unlike mine. I was so frustrated  by the time I got to the end that I trimmed up the pages as best I could and hoped nobody would notice. Thank heavens it turned out well.


I opened the used-to-be-a-book and bent the front and back around to meet each other and use hot glue to keep it together. I kept the glue close to the spine to make it more stable. It look some fussing and fidgeting to get the pages spaced the way I wanted, and I used some more glue to keep them where I wanted.


Then there was the whole issue of how to colour the pumpkin. I thought about watered down acrylic paint but then I worried about the pages sticking together. Then I thought about an orange ink pad, but I didn't find any I liked. So I used some orange spray paint. When I spray paint a project, I use the low part of the rock retaining wall in my backyard.


I let it dry inside while I went foraging for something to use as a stem


I ended up grabbing a twig the maple tree in my front yard left behind. I trimmed it to a reasonable pumpkin stem length and hot glued it in the middle of the hole made by the spine of the book


I rummaged through my ribbon basket and found a pretty green ribbon to tie around the stem for an extra punch of colour. Displayed next to a large decorative spider, it makes the bookcase at the top of my stairs look fun and festive!


Go ahead! Give it a try! Let me know how it works out for you!

.

October 14, 2011

A Halloween craft on a Friday night

I tidied up my crafting room tonight. It still needs some serious sorting and organizing but I can easily use the space now and set up my new Cricut Create! Tonight I made something fun and festive for Halloween!


After some trial and error with blade depth and cut speed, I cut out a few letters using some orange coloured copy paper that I've had hanging around for years using the Don Juan cartridge. I glued the letters to a piece of black craft foam from the dollar store. Then the craft foam was glued to another piece of orange paper, popped the whole thing into a dollar store frame that I bought for a wedding project 4 years ago and finished off with a piece of green ribbon that was in my ribbon basket.

Cute, non?

I think it looks adorable all nestled into the bottom part of our TV stand in the living room. It is a fun punch of colour and seasonally appropriate decor. And on a $0 budget too!

How are you decorating for Halloween this year?


.

October 2, 2011

Weekend Deal in Colour Order

This weekend marked the annual firehall auction/sale for the community where HOTGI grew up. He's been one of their auctioneers for the past 16 years or so and I have a blast every year when we go. You never know what you might come home with! There are some smokin' deals to be had if you are able to think outside the box a little bit.

This year I came home with some great goodies that I will be sharing in future posts, but what I am sharing today is maybe the favourite thing I came home with...


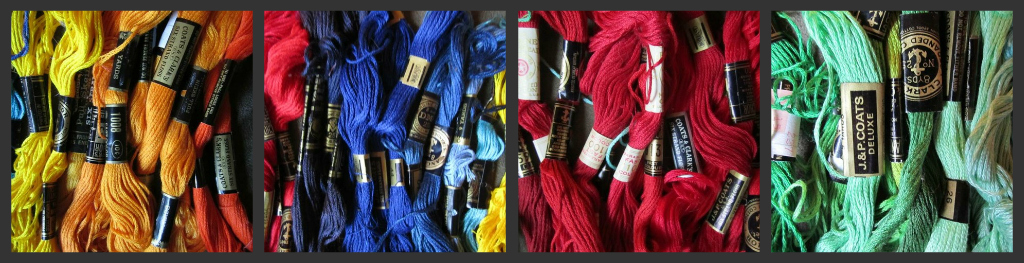
Embroidery floss. 124 skeins of embroidery floss... for $6!!

Check out these five shades of variegated threads!


Lots of beautiful colours! I can't wait to start creating with them!


I have lots of thinking/planning/stitching to do!

.